Our staff had finally had enough. They felt that they could not properly attend to our private pay patients because the task of billing managed care plans had become so cumbersome. Also, our frame inventory never seemed to be accurate, which made it difficult for anybody to manage. And to top it off, our staff never seemed to be able to decipher the writing in our charting notes.
So, the time came to consider a paperless office system. The concept of tracking everything electronically seemed like the holy grail of efficiency to us. A good paperless system can improve the efficiency of billing managed care plans by eliminating entering data twice, a task that is often required for billing third-party vision plans and submitting orders to labs and suppliers. It also automates inventory ordering, control and reporting, while centralizing all patient data in electronic medical records (EMR), which can accept information downloaded from compatible automated instruments.
 |
|
The process of converting to a paperless office entails nail-biting moments, but the end result is worth the effort. |
Step 1: Research
First, we decided what we wanted a paperless office program to accomplish. Specifically, we wanted a program in which our staff could bill major third-party carriers (including authorizing, processing and submitting claims) without re-entering data. We also wanted EMRs that were logical, easy to use and comprehensive. In addition, we wanted to import data from our automated instruments and digital imaging equipment.
Next, we researched paperless systems. We asked our instrument representatives for their suggestions, used the Internet to select the systems that seemed most compatible with our needs, and spoke with colleagues about their experience and degrees of success and satisfaction with their systems. We then selected three software systems that might meet our goals, and interviewed the vendors to determine whether their software packages could fulfill our needs. Next, we called staff at offices that were using the programs and asked them how the software worked in a real-world environment. After talking with other doctors and staff, we selected a software program. Our decision was based primarily on the systems ability to automate insurance billing, lab ordering and inventory. Other features that helped us make a decision include the systems electronic medical records and their compatibility with the automated instruments we own.
Step 2: Implementation
With the help of the vendor, we planned a strategy and timeline for implementing the program, including:
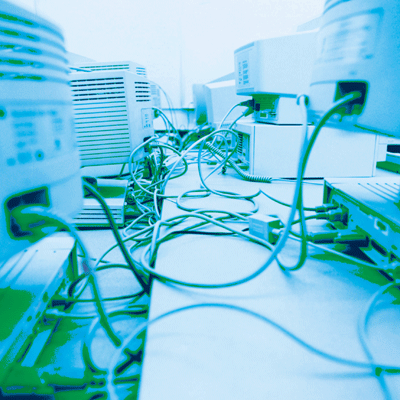
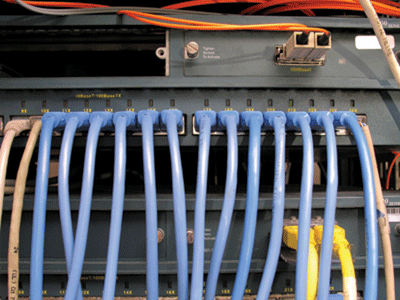
Updating hardware. Sophisticated software requires fast, powerful processors to run efficiently, so a dedicated server and workstations must be powerful enough to handle the demands of the software. The software we selected had specific server and workstation capability requirements. Most of our hardware met these requirements, so we upgraded the memory on several of our workstations and purchased additional workstations.
 |
|
Sophisticated software requires fast, powerful processors to run efficiently, so a dedicated server and workstations must be powerful enough to handle the demands of the software. |
Your hardware update will include protection for your electronic data. Several back-up options are available today to ensure that your electronic data is protected. We chose a tape back-up with powerful and easy-to-use software. The tape back-up system stores and verifies our data every night; we then take the tapes off-site for safety. Other IT companies may advise a CD back-up, but our company was more comfortable with a modern tape system for our software.
Your IT company may also need to install miscellaneous equipment. Ours installed bar code scanners and printers to help us efficiently and accurately manage our inventory. Our IT company also installed a sophisticated, high-volume scanner for scanning miscellaneous itemssuch as referral letters from other doctors, patient photos and welcome formsinto a patients record.
Initializing the new software. This included entering basic practice information, billing preferences, fee schedules, etc. We computerized our old records, which means we converted them so the basic patient information and demographical data transferred to the new database. However, the financial, insurance and medical information did not transfer, so we had to enter this information. The vendor informed us that this could occur. Also, we had to re-enter our entire frame and optical inventory because we were planning to use a new bar code scanning system.
Step 3: Training and Conversion
Our vendor offered online training to help acquaint us with the various features of the program to prepare us for on-site training. Online training also helped us to enter our fee schedules and insurance information for third-party billing. We completed this task prior to on-site training so the trainer could spend more time helping us and our staff navigate through the system and solve any initial problems.
We scheduled the software to go live during on-site training. The vendor advised us to close our office for the first two to three days of training and then book lightly (i.e., one patient an hour) for the remainder of the week. The time between our decision to purchase the software program and on-site training was about six months.
When converting to a paperless system, vendors will likely offer you training options. Our options included gradually converting to a paperless system or converting all of our systems at the same time. After talking with the staff at offices that were using the same software, we realized that these offices were not using the software to its potential, like we planned to. For example, other offices were not using the inventory feature to its full potential or linking all of their automated equipment to EMRs. Therefore, we had no recommendations to guide us. But, the allure of getting rid of piles of paperwork convinced us to completely convert to a paperless format. The office staff we had spoken to warned us about how painful the conversion process was, but we were fully prepared (or so we thought) for the problems that would arise.
We closed our office for the first two days of training and conversion, and lightly booked appointments for the remainder of the week. Conversion did not go well. Some software functions froze, and it took the better part of our first training day to solve the problems. Also, although our trainer was excellent and well prepared, he provided more information than we could digest in one sitting.
On days two and three, our third-party claims could not be submitted and we had to work with technical support to realign our fee schedules with correct submission codes before proceeding further. Also, the data from our automated instruments would not download into the EMRs properly, although everything appeared to be set up properly. We finally solved the problem with the aid of technical support and the instrument manufacturers
technical guidance.
Step 4: Personal Adjustment
During the first few days of using EMRs, we felt like fish out of water. But, we soon began to appreciate the completeness and accuracy of EMRs. One of the best features of EMRs is that you must complete all fields required for a coded level of service. If managed care or Medicare has audited your records, you will appreciate this. EMRs are efficient and your staff can read them, unlike some handwritten notes. EMRs also allow you to instantly view data on a patient. For example, contact lens fittings and trial lenses are in a chronological format. Our days of sifting though formsto determine which prescription or trial lens the patient was using at the time of his appointmentare gone.
 |
|
Electronic medical records allow you to instantly view patient data, so you no longer have to sift through forms. |
Our staff previously took about 20 minutes to complete the average insurance claim. This included authorization, claims calculation and submission, and reconciliation with the explanation of benefits. However, with the new software, this process takes about five minutes. Our office manager calculated that we save about 1.5 hours per day by completing insurance claims electronically.
The Outcome
No doubt about ita paperless system is expensive. Expect to spend about $60,000 for the new software, hardware updates and peripherals for an office with 12 workstations and a dedicated server. This figure also includes the $5,000 to $7,000 that an IT company will charge to set up and administer your network. We would not advise anyone to set up their network without an IT company, unless you have the necessary training and patience to handle this technology.
To pay for our paperless system, we set up a reserve account and made weekly deposits into it. We met our target goal in about 14 months. We kept this reserve account and now make monthly deposits to pay for the paperless systems annual support fees of about $4,000. These fees cover online and telephone support and all upgrades.
According to a recent study, initial costs for an electronic health records system averaged $44,000, and ongoing costs averaged $8,500 per year.1 However, the average practice paid for the cost in 2.5 years and profited after that.
We have been using the paperless system for several months and have seen two primary advantages: efficiency and decreased staff stress. I believe that after all the features are running smoothly and the staff is comfortable, our office will be about 20% more efficient in terms of time and patient satisfaction than it was without a paperless system. Given our present gross volume and rate of growth, this means that the efficiencies of this new software can effectively cover two full-time staff positions, which can boost net practice income. In addition, the staff has lowered their stress level by having complete, legible and professional records with data logically recorded and organized.
Another advantage is patient satisfaction. We can now attend to patients more completely and accurately. For example, we can better monitor eyewear jobs for delays and problems, so they can be solved before they become a crisis. We no longer have eyewear jobs that fall through the cracks, so our eyewear delivery time has improved.
Although a paperless system increases efficiency and decreases staff stress, implementation of such a system and comfort using it does not happen overnight. We started to feel comfortable using the system after about four months. By six months, we had explored and used every aspect of the system, but we were still getting comfortable with some of the features, such as merging capabilities.
Also, we are still working out a few problems with the system. For example, the insurance calculator does not calculate to the penny and the bar code printer does not function properly with the inventory software. However, we are working with technical support to fix these problems.
If you are considering converting to a paperless system, thoroughly research software systems and talk with staff at offices that are using these systems. I recommend converting to a paperless system all at once. You will likely become comfortable with the system within six to nine months if you commit to learning the software and using it to its full potential. Remember that the transition process can be stressful, but everything worthwhile takes time.
Drs. Travis Adlington and Cheryl Adlington are a husband and wife team in private practice in Reno, Nev. In addition to running a successful high-end practice, they offer innovative and tailored consulting services to select clients. They can be reached by phone at (775) 284-3937 or by e-mail at tadlington@eyeglassgallery.net. Their web address is www.eyeglassgallery.net.
1. Miller RH, West C, Brown TM, et al. The value of electronic health records in solo or small group practices. Health Aff (Millwood) 2005 Sep-Oct;24(5):1127-37.

